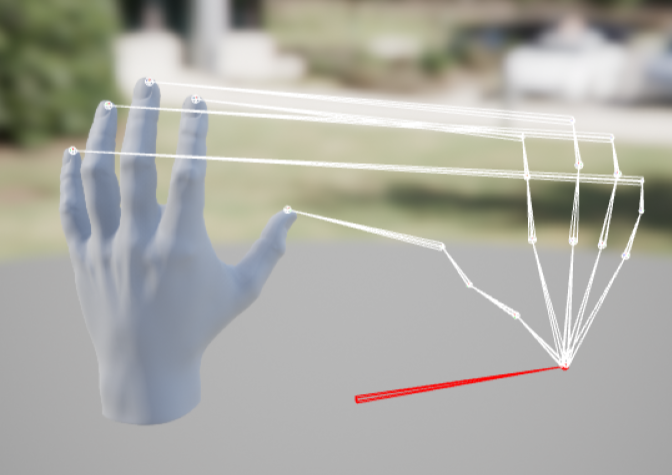
Hands
Using the Body State system, the plugin supports basic auto-mapping of
tracked data to skeletal mesh bones for 1 or 2 hands in single or
multiple meshes.
The auto-mapping function should work on 3, 4, or 5 bones per mesh and will auto-detect this setup in your rig. This will eliminate most of the work of rigging hand bones, and should make it easy to switch to new skeletal meshes, even with different skeletal naming schemes.
Getting Started
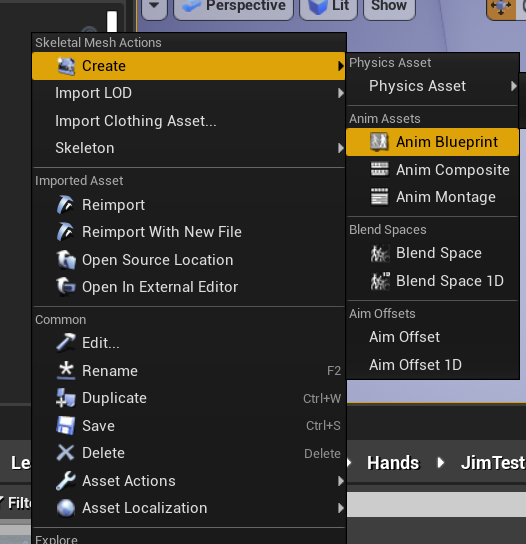
To get started with a newly imported model, right click on the model and
choose Create->Anim Blueprint
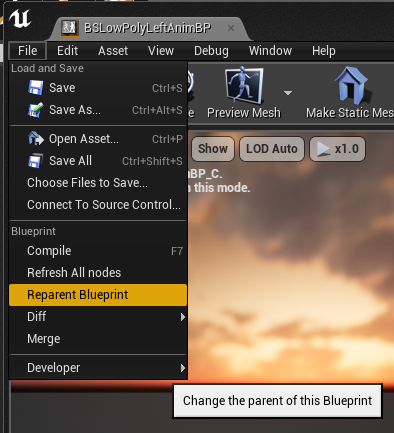
To add auto-mapping to your own anim instance, re-parent it a
BodyStateAnimInstance
Once done, turn on Detect Hand Rotation During Auto Mapping and hit
the Auto map button. New class defaults will now be created if bones
were mapped successfully.
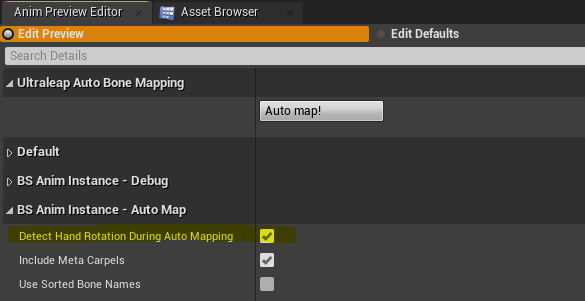
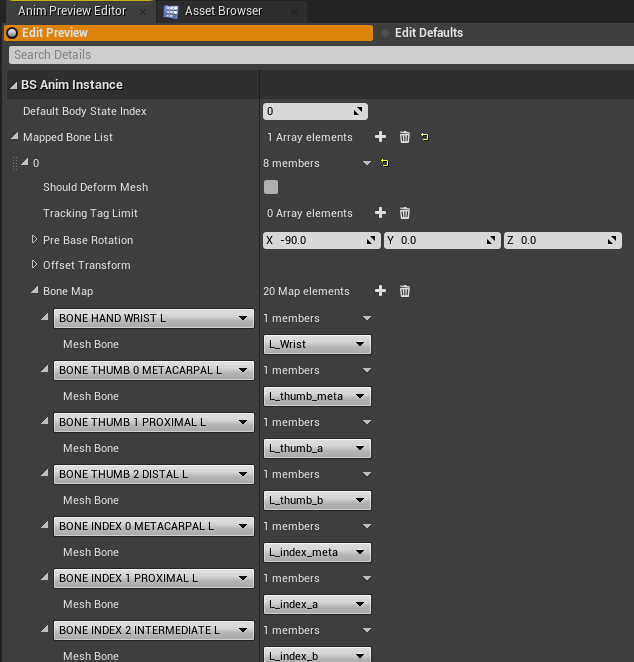
Once auto-mapped, compile the blueprint to see the results. After the
compile you’ll see a lot of values auto-filled in your
anim preview editor window
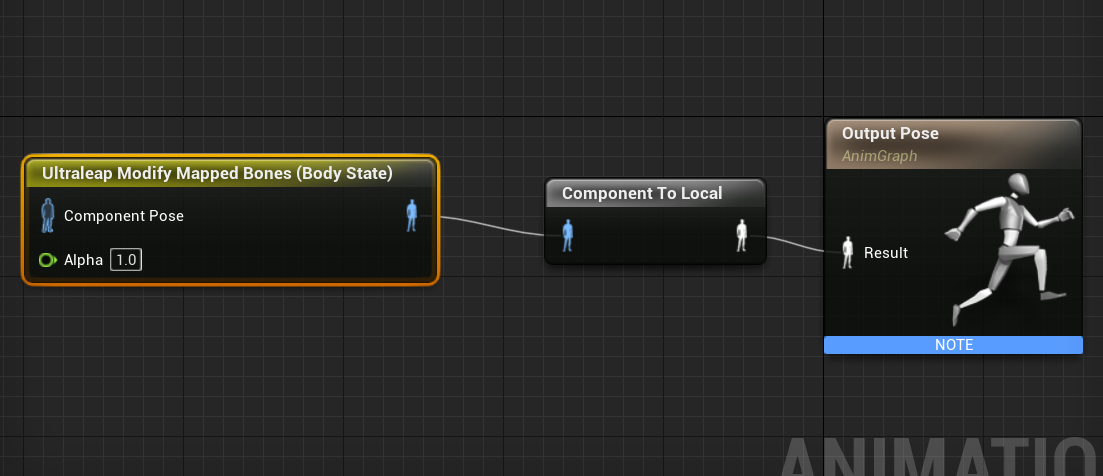
To enable the hand animation, add an Ultraleap Modify Mapped Bones
node to the AnimGraph and connect it to the output pose. This maps
incoming hand tracking data to the hand skeleton at runtime.
By default, auto-mapping is set to your left hand. Simply changing the type to right will change the targeting. Hit compile to affect changes after changing type.
The tracking is now live in the editor. You should be able to place your hand in front of your hand tracking camera and press F to center on the tracked location to preview how the rigging behaves with real data.
Modifying Auto-map results
Automatic Scaling
To have the hand model automatically scale to the user’s hand, turn on
Scale Model to Tracking Data and click the Automap button. The
hand model when tracked will scale to any user’s hand size. The scaling
can be tweaked by changing the offset sliders to fit better with the
mapped model.
Deformation
If you don’t have a mesh setup that deforms well you can turn that off
by adding an entry to your Mapped Bone List array and unchecking
Should Deform Mesh.
Any changes done to this Mapped Bone Anim Data
entry will be applied after your auto-map fills it. Check your Anim
Preview Editor to see all the mapped bone entries and final settings.
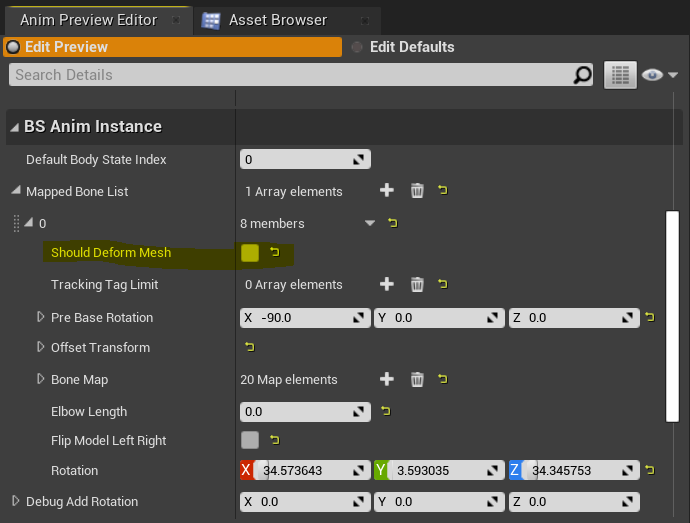
If you turn off deformation, only rotations will be applied to the
mapped bones. To ensure the hand is still placed at the correct location
you may need to fill your anim graph with appropriate custom changes.
In this example we modify our L_wrist bone to translate to our
BodyState wrist position. With this node active before all of our other
rotations, we can now toggle the deform mesh to see how it changes the
mesh hand.
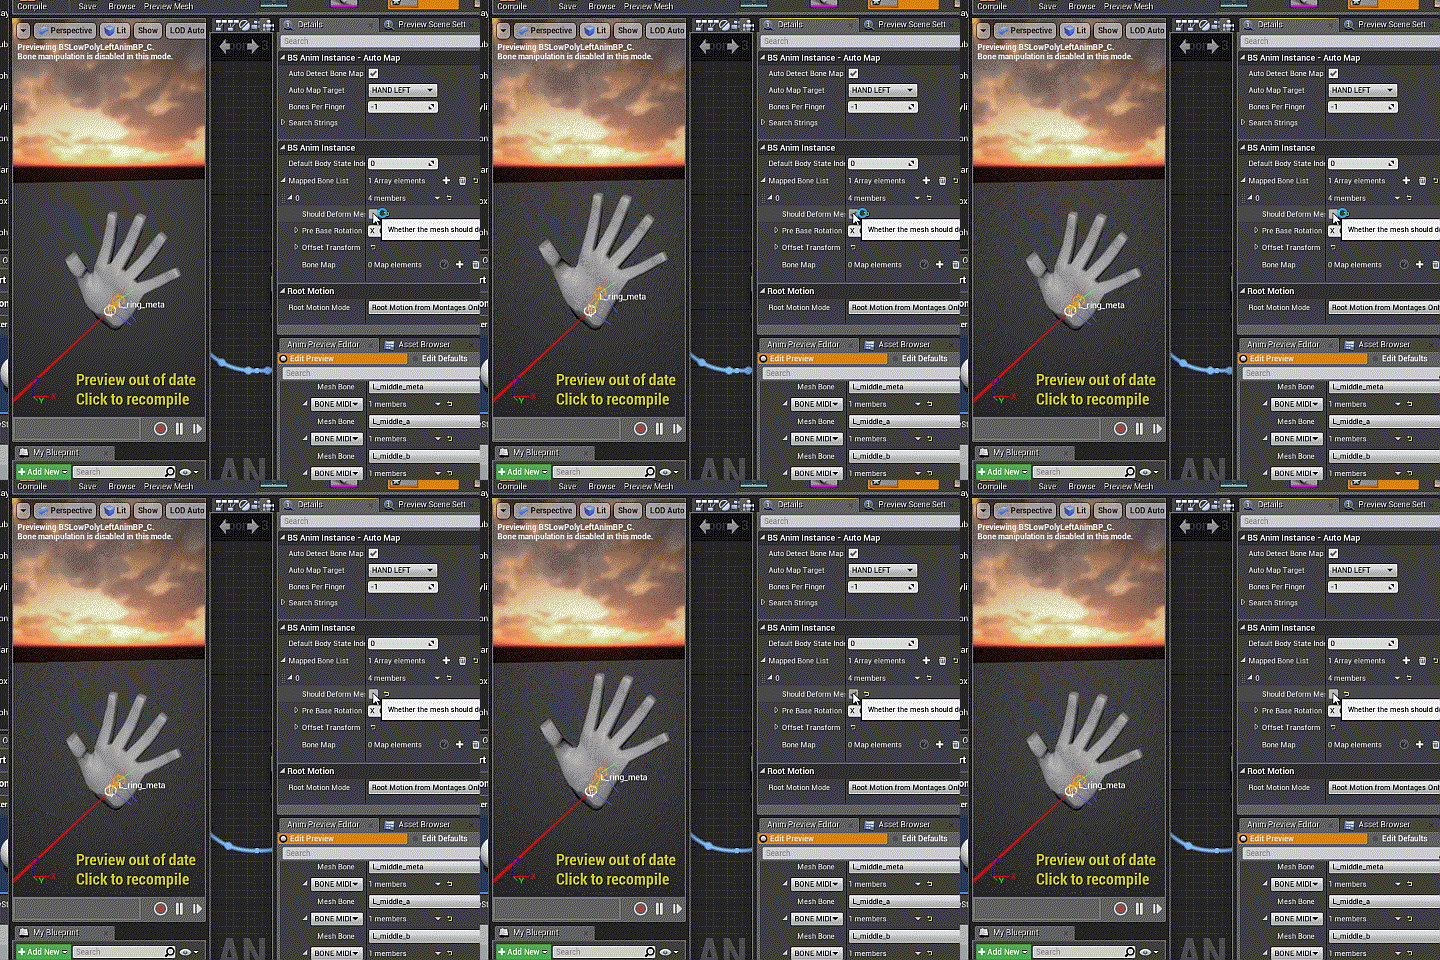
Note that the hand wrist position doesn’t move since the deformed mesh position for the wrist is the same as the one we made in the graph.
Modifying mapping results
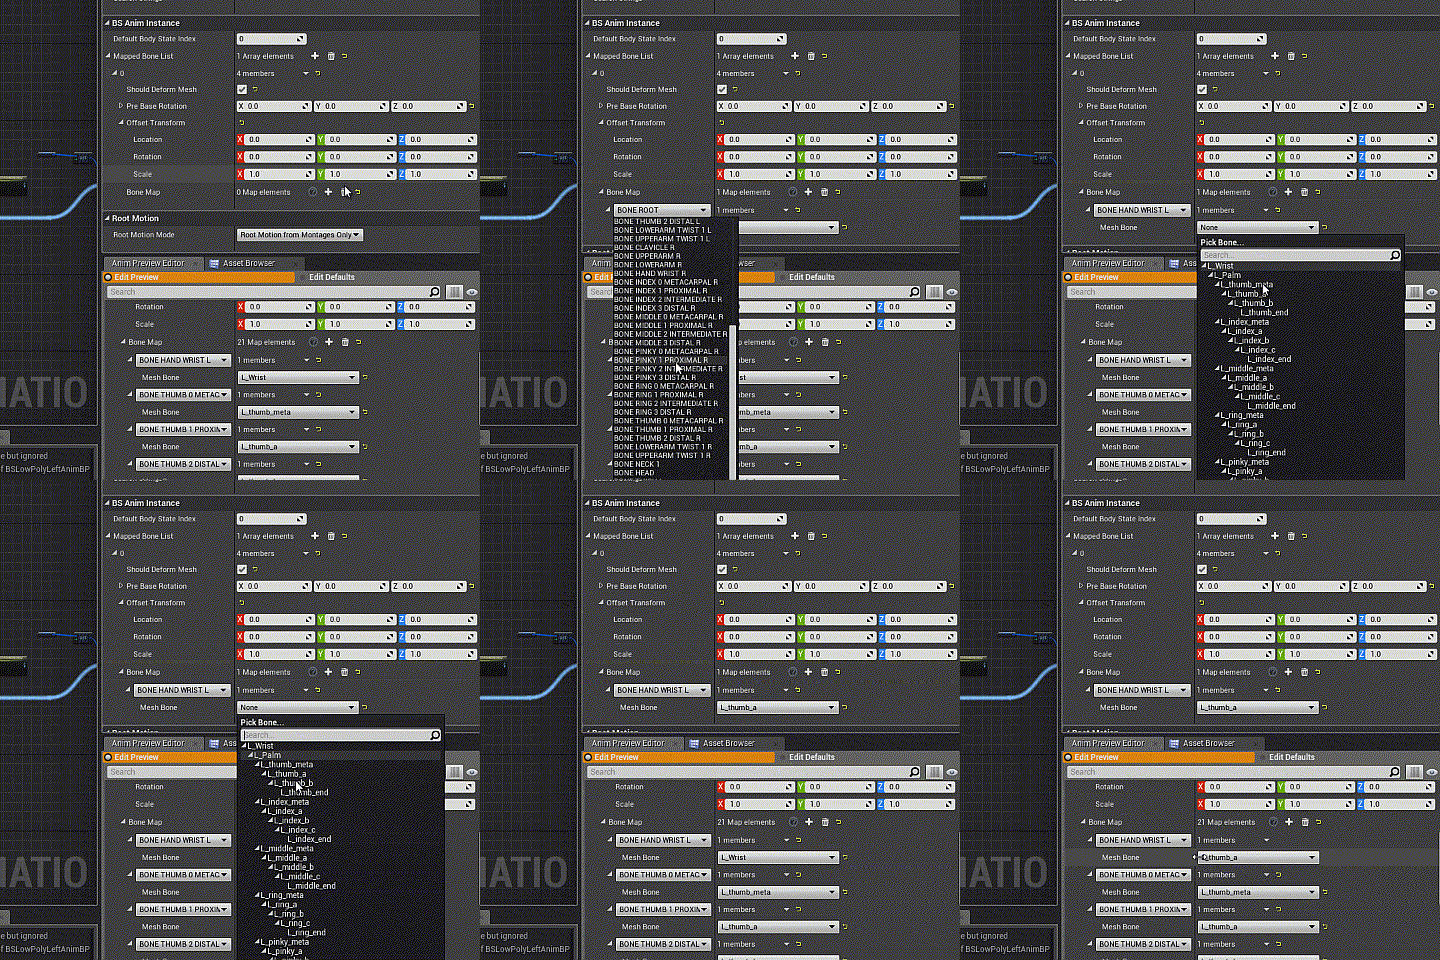
If the auto-mapping got some things right, but some things wrong, you
can override the results by adding a Mapped Bone Anim Data entry and
then changing individual bone maps. These are applied after the auto-map
procedure so they will take precedence. Hit compile after adding bones
to see changes.
Saving auto-map results
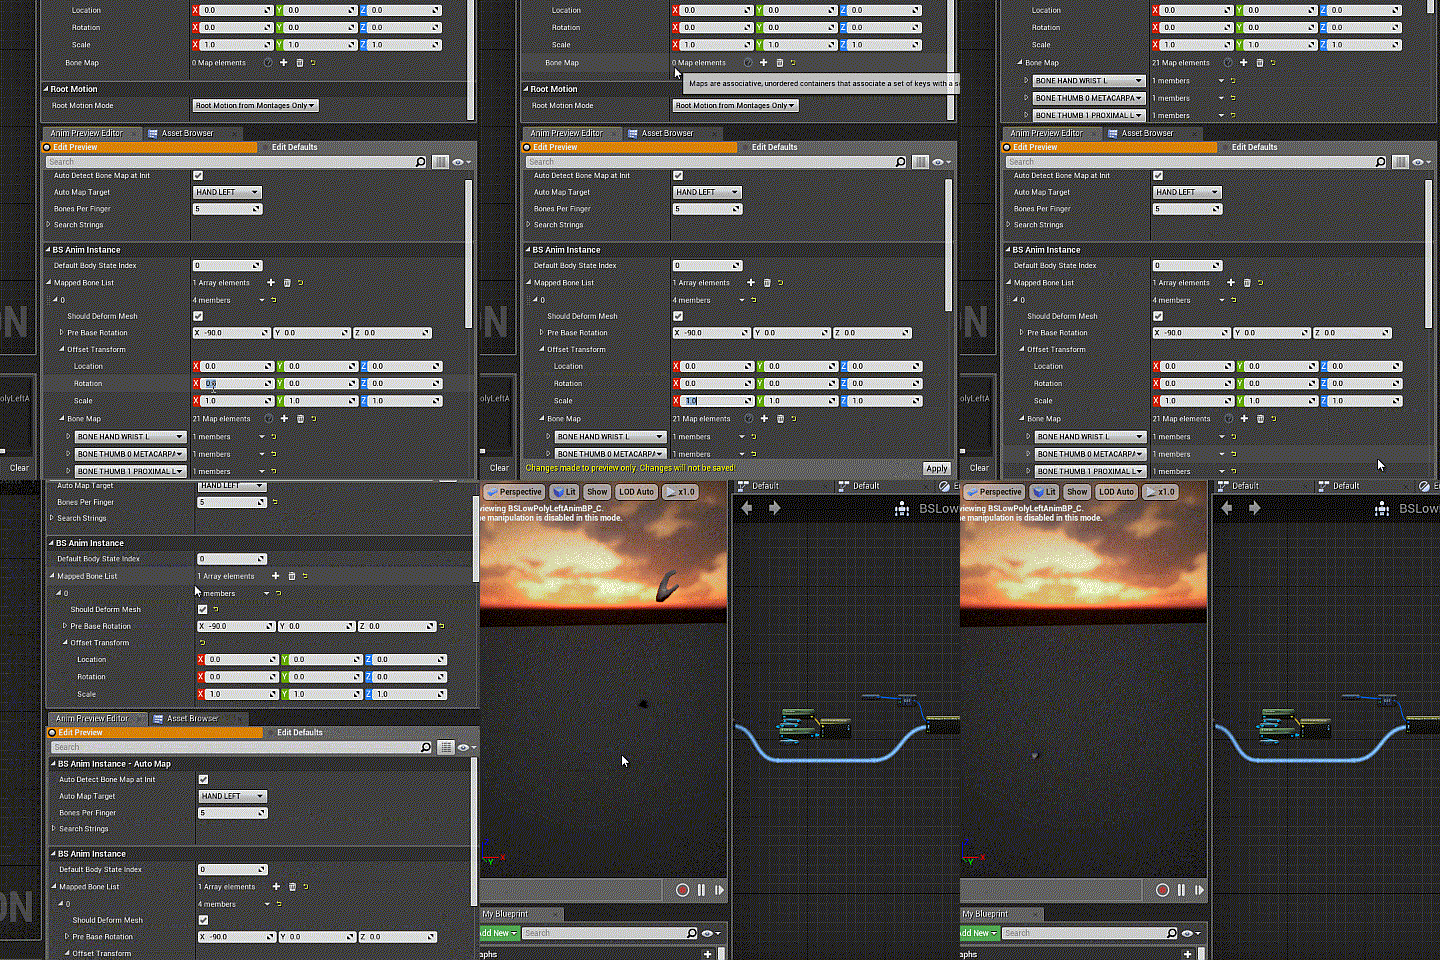
You can save your auto-map results to stop it from re-mapping each time
an instance is spawned. To do this hit apply in your
anim preview editor and untick auto-mapping. You will see that the
tracking still works as the same bones now show in your
Mapped Bone List but in the class defaults section.
Flipped Chirality (left to right or right to left mapped models)
Often a single mesh is used as the model for both hands. In this case
the hand that is not the same chirality (left or right) needs to have
its rendering flipped. This is done in code by setting the scale to -1
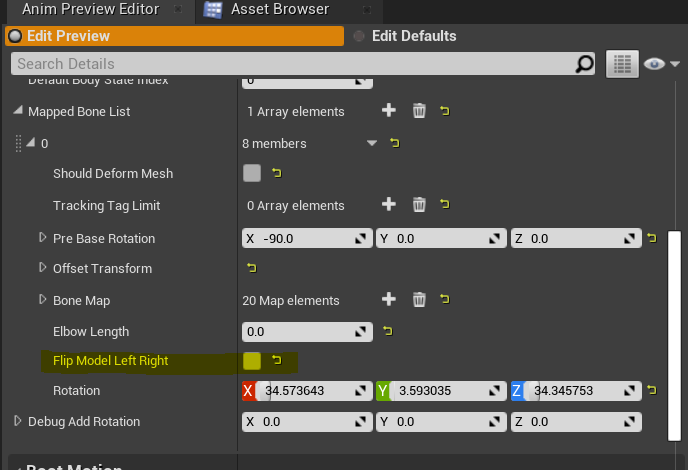
on the X-axis. To flip the chirality of the model, enable Flip Model
Left Right in the Mapped Bone list.
Two handed meshes
It is recommended to separate your hand meshes into their own skeletal meshes to make hiding un-tracked hands easy. However, the auto-mapping system does support two handed meshes for e.g. characters and other atypical setups.
Start by changing the auto-mapping target to Both Hands which will
make two arrays, one for each hand. The reason for multiple arrays is
because it is typical for animators to rig hands with different rotation
basis to ensure positive rotation values close your hand. The
auto-mapping compensates for this by using a different pre-base rotation
for each cluster of bones related to each hand.
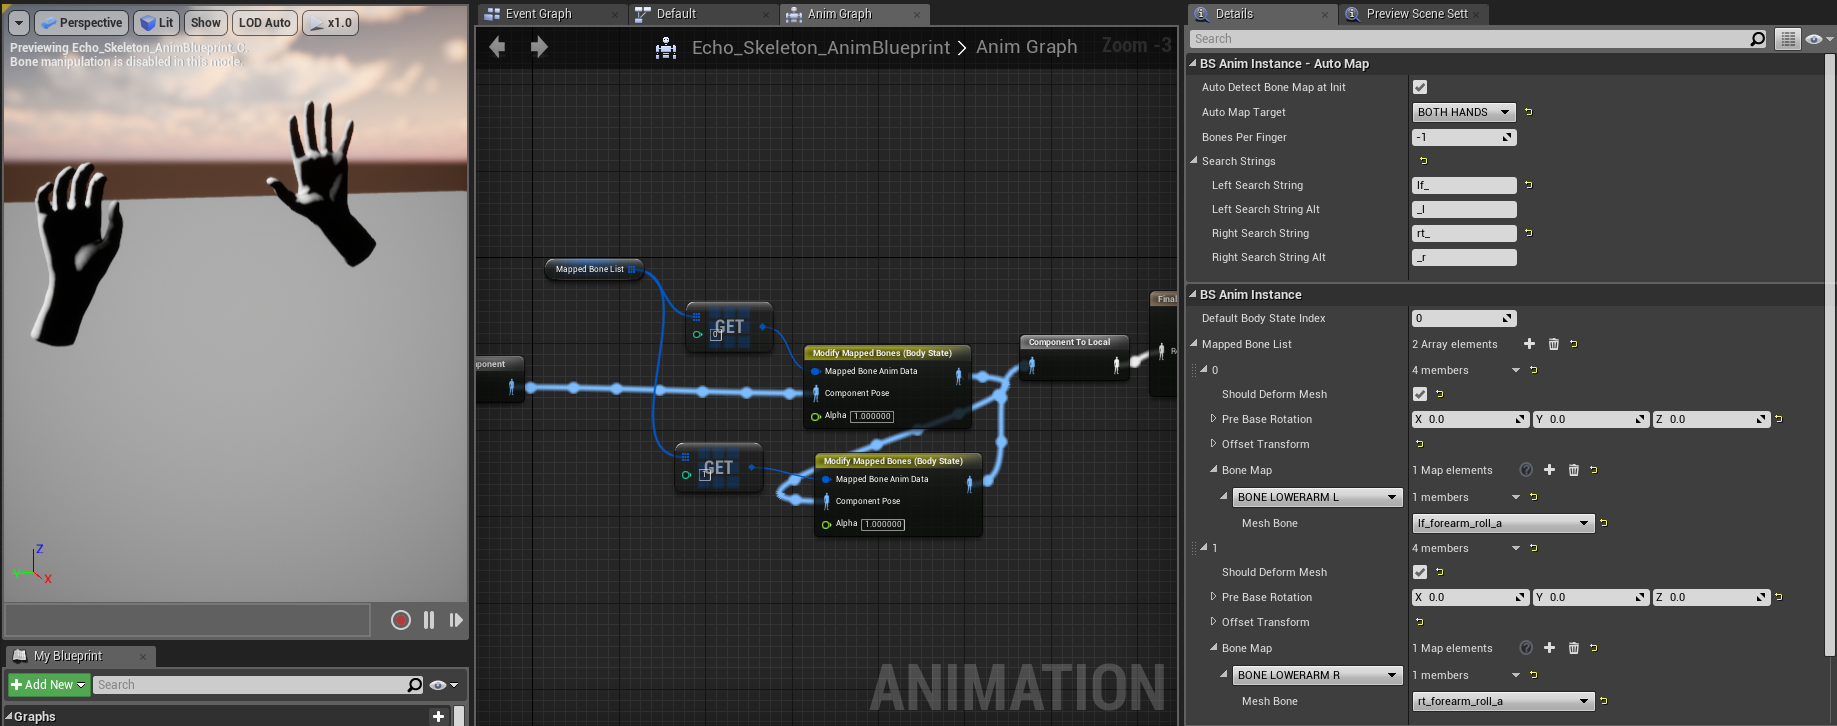
Since you have two entries of Mapped Bone Anim Data you should add
another Modify Mapped Bones node in your anim graph so both
positions and rotations are set.
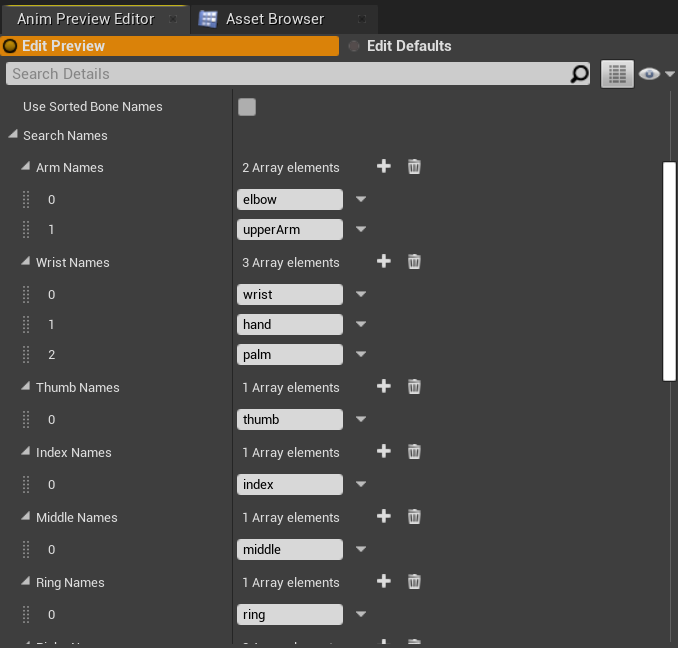
Modifying Search Parameters
When auto mapping bone names, fixed strings are used to detect which
bone is which in the skeleton. These can be modified in the Search
Names parameter which is initially populated with the most common bone
names.
Character meshes
The procedure for character meshes is the same as other two handed meshes, but may also need more custom nodes to compensate for lack of e.g. deformation.
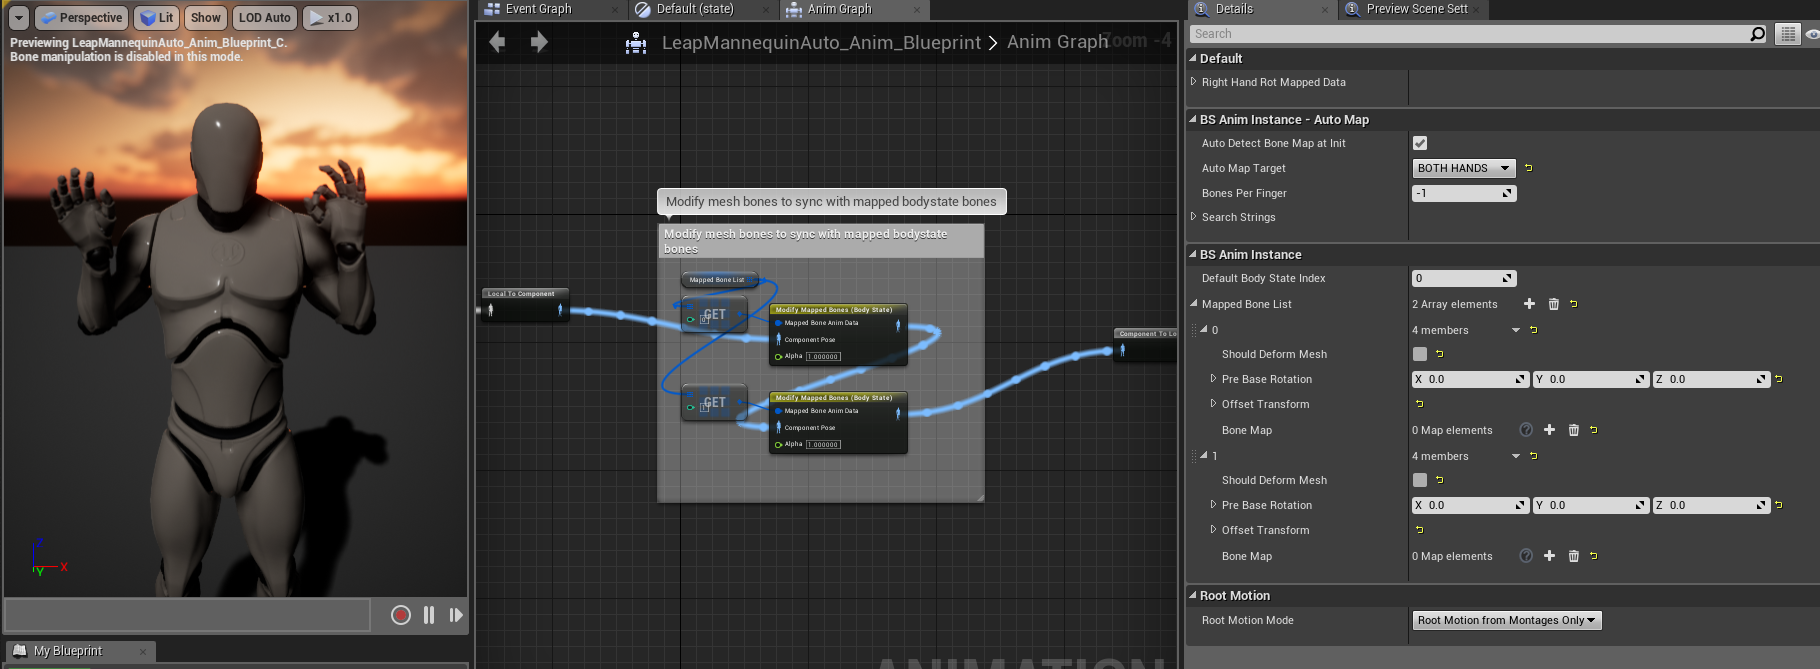
The above anim graphs shows auto-mapping to the standard UE mannequin
skeletal mesh. Similar to the earlier two-hand example, we use two
arrays of Mapped Bone Anim Data. Then we turn off deform mesh as the
weight painting on this mesh doesn’t support deformation.
With this setup, only the rotations are tracked. You’ll need to either use FK, FABRIK, or your own setup to move the elbows to the correct places.
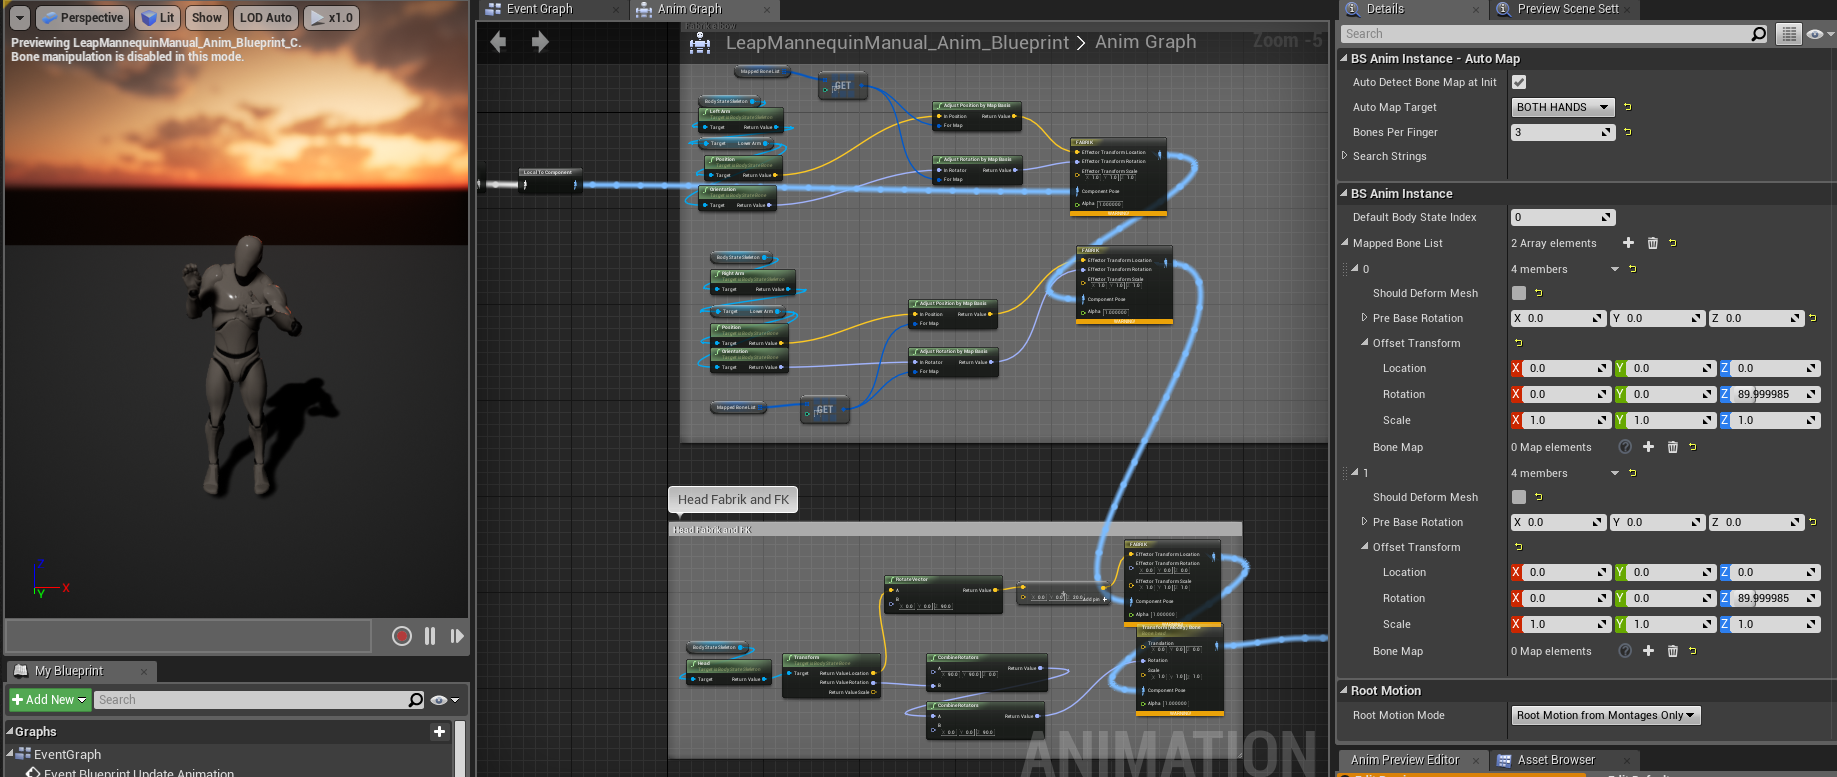
In the above example we use FABRIK to each elbow, and another fabrik to the head. This uses our HMD data which is auto-set in the body state system. Finally we rotate all of our mapped data by 90 degrees in the offset transform for Y forward, which is how skeletal meshes are typically set up.
While we needed to do some custom work in this instance, there was no need to manually map each finger or to forward data to the anim graph. Both of these saved hours of work.
For characters, don’t forget to use the alpha value to blend out of tracked data when tracking stops and e.g. resume your idle animations.
Adding Hands To An Actor
Once the anim blueprint is set up for each hand, the hands can be added
to an Actor as Child Actor Components. See the example hands in the
HandModules/Hands folder in the UltraleapTracking plugin content.
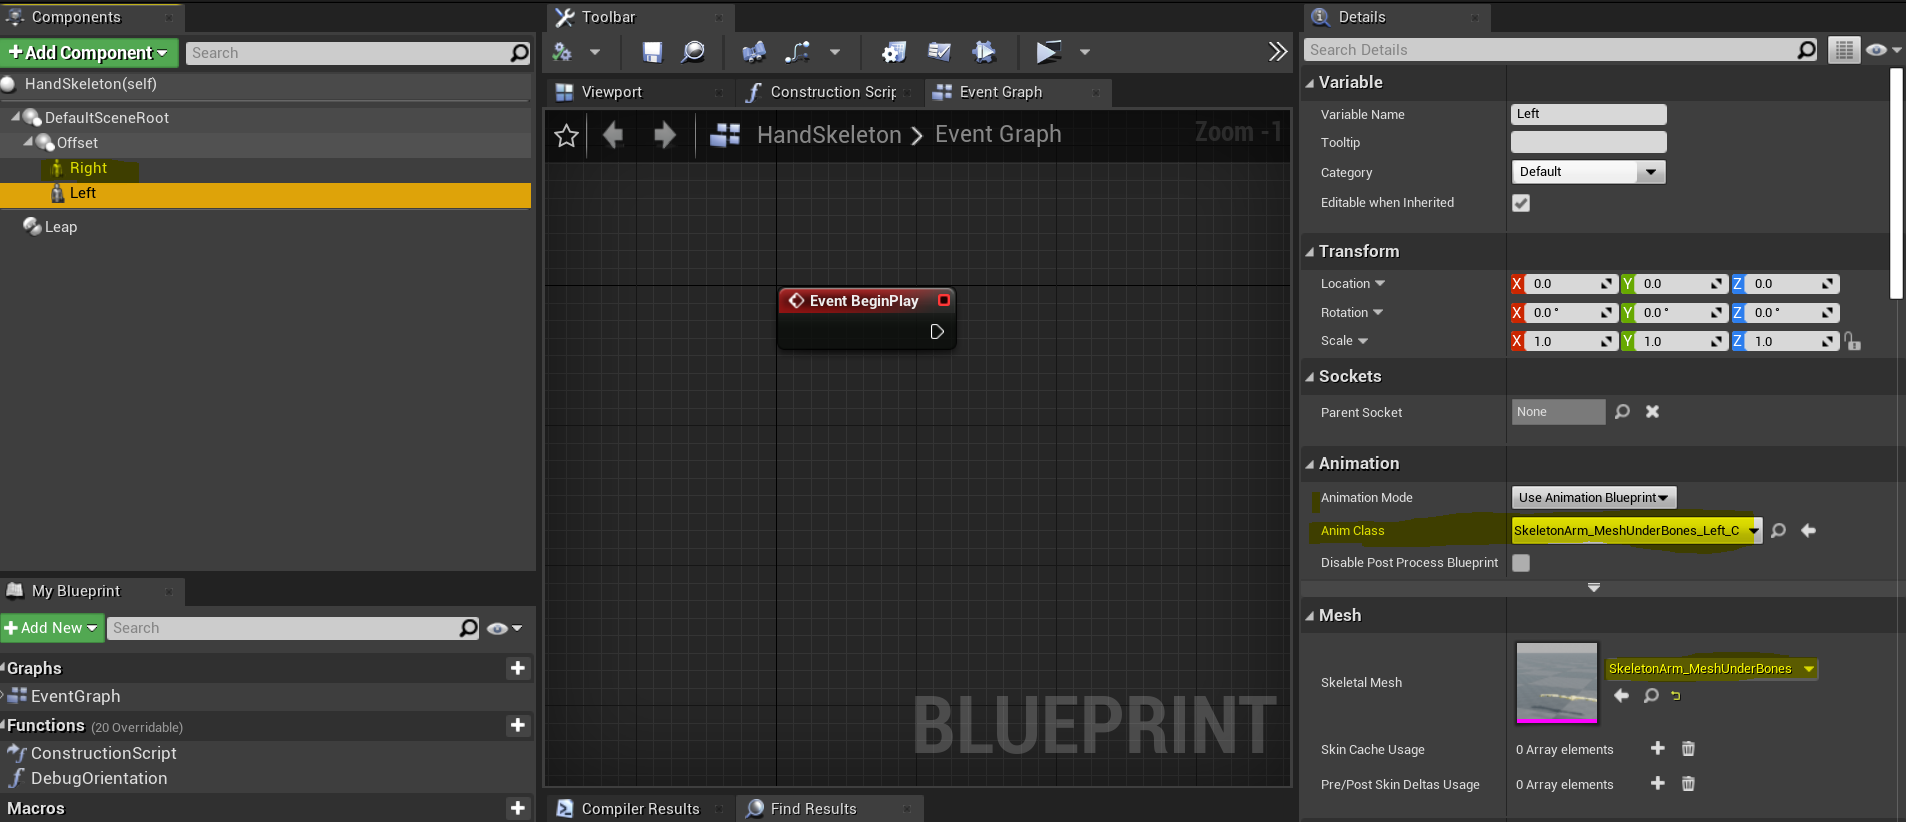
This actor can then be dragged into the scene to use the mapped hands at runtime.
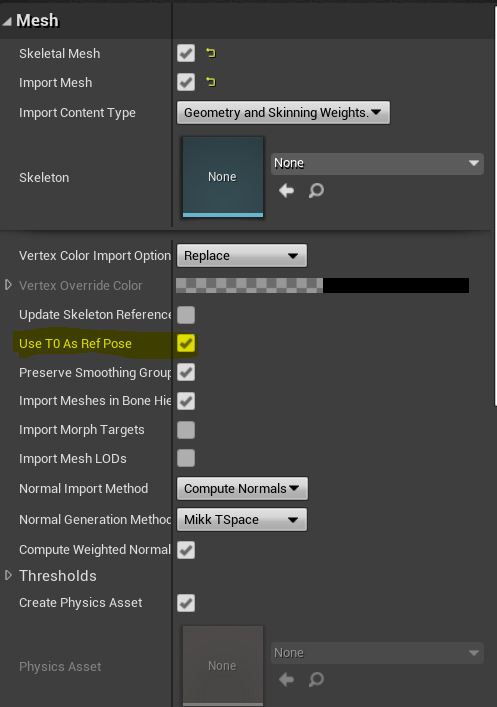
Note
A tip on Unreal’s FBX import settings. When importing FBX hand models, if the model imports with the skeleton separated from the mesh as below, turn on Use T0 as Ref pose
